How to Carry Your Camera When Hiking
One of the best tips I ever read with regard to outdoor photography was to make sure your camera is always within reach and ready to take a shot at a moment’s notice. In nature, there isn’t always time to stop, unpack your backpack, take off your lens cap, and take a picture of whatever fantastic thing you’re looking at.
A cloud may obscure your sunset, the animal you spotted may run away, or maybe your hiking partner moves from a picturesque perch on the summit of a mountain. In photography, we capture moments in time, but if we miss that moment, there’s no going back. Therefore, it becomes extremely important to figure out how to carry your camera when you’re hiking or backpacking.
There are a few things to take into consideration when deciding how to carry your camera for hiking trips. You want your carrying method to be comfortable for your body as you walk, and you’ll want your camera to be somewhat protected since hiking often involves dealing with poor weather and rough trails which may cause you to trip.
Of course, as mentioned, you want your camera to be relatively accessible. If your camera is buried in your backpack, you’ll be much less likely to get it out each time you see something interesting, and as a result, you won’t take nearly as many pictures as you could if it were more accessible. At the end of the day, it really comes down to personal preference, so take a look at these different carrying methods and see which one seems like the best fit for you!

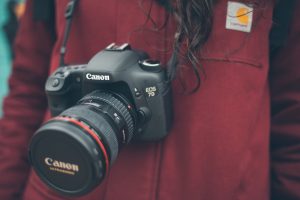
Using a neck strap
One of the simplest ways to carry your camera is using a standard neck strap. This method is great in the sense that the camera is extremely accessible, but I personally find it really annoying to have the camera bouncing around against my body as I walk.
You also have to be careful when your camera is dangling from around your neck, because should you fall, your camera is likely going to be the first thing to hit the ground.
If you’re going on a casual day hike, this method might work for you, but for more serious and rugged hikes, a more secure carrying method may be desirable.

Keeping it in your backpack
Carrying your camera in a backpack is potentially the easiest method of carrying your camera comfortably and safely, but at the cost of accessibility. However, if you do choose to carry your camera in your backpack, there are things you can do to make this carrying method more effective.
First of all, when packing your hiking bag, pack your camera last. This will put your camera at the top of your bag so it’s easy to get to. Some backpacks are actually designed for cameras specifically in mind, and they have special access zippers that gets you access to your rig. Additionally, you may want to ensure you put your camera in a case or wrap it with soft items before you place it in your backpack. You won’t want your camera lens to be rubbing up against any sharp or hard items in the backpack.

Using a “Quick Detach” clip
There are a few different companies now that make special clip devices that allow you to quickly connect and disconnect your camera to the straps of your backpack. Typically, one half of the clip secures to the shoulder strap of your backpack, while the other half connects to the tripod attachment area of your camera. These clips are great because they leave your camera very accessible, and it’s more comfortable than just dangling your camera from the neck strap.
These quick detach camera carrying clips are great, but they don’t do much in the way of protection, and large cameras with heavy lenses can still be a bit annoying to have hanging from one shoulder strap.

Use a Case
Buying a case for your camera can potentially unlock a whole new world of opportunities for carrying your camera. Many cases have belt attachments, so you can carry the case and the camera on your hips or even backpack straps. This method is a great balance between accessibility, protection, and cost, though these are all highly variable on what style of case you decide to buy.
Personally, my favorite cases are those that have a “top loading” camera compartment, a small pocket for SD cards and micro-fiber cleaning clothes, and a belt attachment strap. This type of case checks most of the boxes for an outdoor photography carrying system, because once you attach it to your belt you can use the neck strap included for extra support, comfort, and protection.
If you have any comments then please drop us a message on our Outdoor Revival Facebook page
If you have a good story to tell or blog let us know about it on our FB page, we’re also happy for article or review submissions, we’d love to hear from you.
We live in a beautiful world, get out there and enjoy it.
Outdoor Revival – Reconnecting us all with the Outdoors